CodeGuard is truly a game-changing security product, providing full-automated site scans, one-click backups and version control. And if you, like so many of the world’s top websites, are using WordPress as your CMS, setting up CodeGuard is a simple three step process.
Note: The WordPress plugin is the fastest, easiest way to set up CodeGuard backups. However, if you have FTP/SFTP access to your website, that option offers additional features, better performance, and reduced storage space usage. See our article on How To Setup Website Backups via FTP/SFTP with CodeGuard.
Download the CodeGuard plugin and upload it to your WordPress site.
This is exceedingly simple, just download the plugin here. Then sign into your WordPress dashboard and go to “Plugins > Add New” in the sidebar. You’ll need admin permissions to do this.
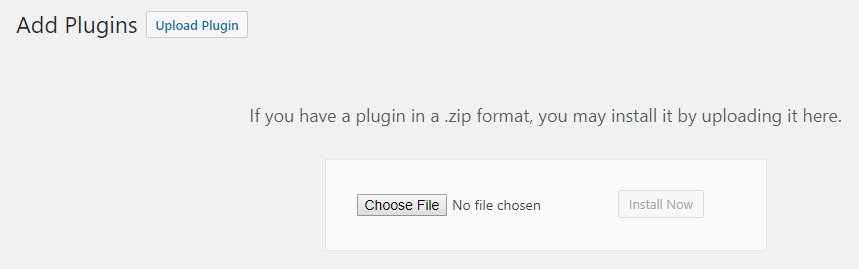
Once the Plugins page loads, the “Upload Plugin” button is beside the “Add Plugins” heading.
Simply select the CodeGuard plugin and WordPress will do the rest.Activate the plugin
In the Plugins section of your WordPress dashboard, scroll down through your list of plugins until you find the Code Guard plugin. Then click “Activate.”
Enter your unique access key

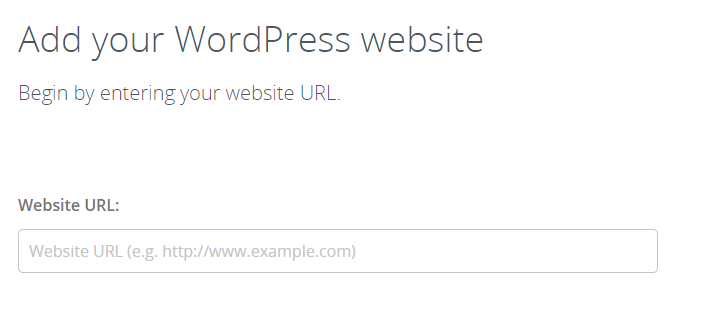
Log in to your CodeGuard dashboard and click “Add WordPress Website”. Enter your URL and click “Next”:

During the course of this workflow, you will be given a unique activation key like this: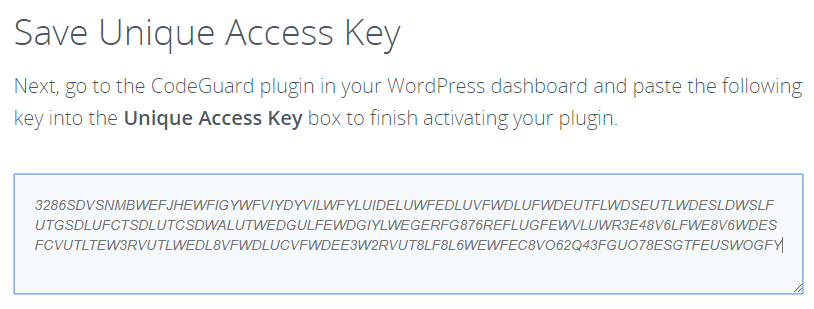
Now go back to your WordPress admin dashboard and click on CodeGuard in the left sidebar. Copy the key and paste it into this field:
You’ve now activated CodeGuard WordPress backups!